
Running Vagrant and Ansible in Windows 10 through WSL2

So, wether you are setting your homelab up for learning purposes, or your homeserver if you have the more advanced knowledge, or even on production in a company, you may want to automatize the process of creating, configuring and deleting Virtual Machines (VM’s) for multiple purposes.
What is Vagrant?
You may use any of the most popular virtualization software out there like VirtualBox, VMware, Hyper-V, KVM, AWS, Docker, etc… but creating Virtual Machines the manual way can be a hustle and bustle as it usually requires to download an ISO File for the target OS that you are going to install into and then wait for the installation process which can take a while to complete. Once you have one Virtual Machine up and working most of these software programs allo you to replicate the configuration so that you can create multiple other machines in a matter of seconds.
But what if you could have a Virtual Machine up and running with all the configurations needed already done in just a matter of seconds? And not only that, but allows you to move that virtual machine to another computer by just sending a text file. That is Vagrant, a software that allows creation and management of portable virtual machines.
So how does Vagrant work? Vagrant uses “Provisioners” and “Providers” as building blocks to manage the development environments. Provisioners are tools that allow users to customize the configuration of virtual environments. Examples of the most used Provisioners used in Vagrant are Puppet and Ansible, being the latter the one we are covering in this post later on.
Providers are the services that Vagrant uses to set up and create virtual environments. Vagrant comes with native support of VirtualBox, Hyper-V, and Docker virtualization, while VMware and AWS are supported via plugins.
What we are covering in this post is using Vagrant and Ansible in Windows 10 using Windows Subsystem for Linux in it’s second version (WSL2). This newer version of WSL launches a full virtual machine of Linux (in the Windows Store you can choose to install Ubuntu, Debian, Kali, Suse, etc…), so since it is a full Linux OS that is running everything should work just like in a Linux partition right? Well, not quite… WSL2 directories runs on it’s own network adapter usually called vEthernet (WSL), so accesing resources from either side (Windows 10 to WSL2 filesystem and folders as well as from WSL2 to Windows 10 filesystem and folders) makes use of the ethernet adapter all the time, and everything goes through the firewall and here is when things get complicated when you try to set things up for the first time (not anymore since I am giving all the steps needed to circumvent all the probles that may arise during installation and first use of Vagrant).
Installation
Now, let’s get our hands dirty doing what we love the most: the terminal. For Vagrant to work with WSL2 and Windows 10 we need to install the same version of Vagrant in both Windows 10 and WSL2.
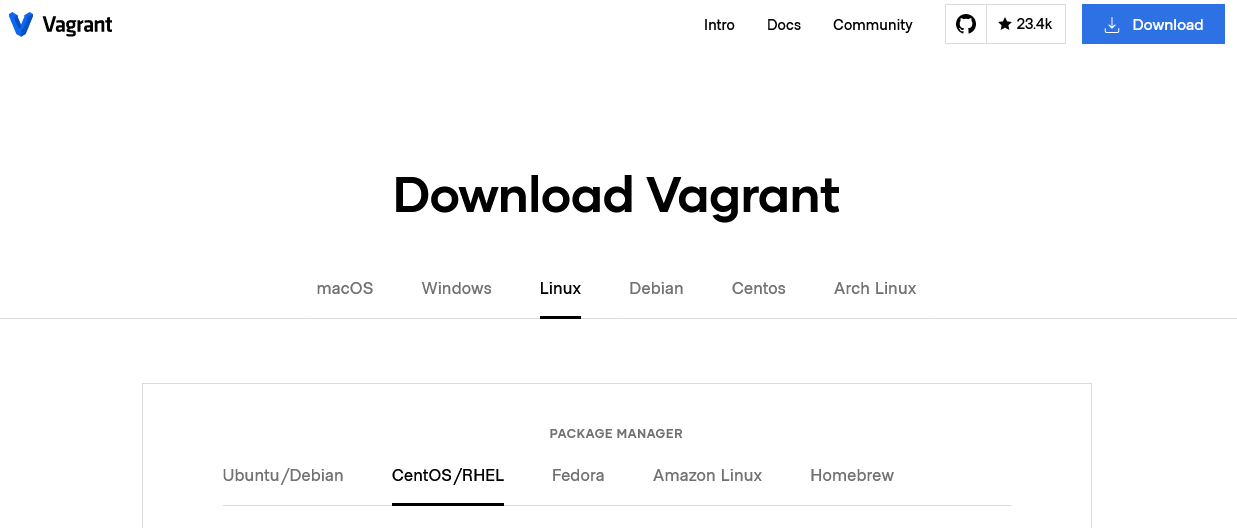
For The Windows installation you may go to the downloads page of Vagrant and download the binary for the OS version you are using 32-bit or 64-bit. Nowadays is more likely that you are using the 64-bit, but if you are not sure what you are using type uname -i in the WSL terminal and it will print what OS you are using.
Once it is donwloaded and installed open your WSL terminal and, assuming you are using Debian or a Debian derived OS like Ubuntu, type the following commands:
curl -fsSL https://apt.releases.hashicorp.com/gpg | sudo apt-key add -
sudo apt-add-repository "deb [arch=amd64] https://apt.releases.hashicorp.com $(lsb_release -cs) main"
sudo apt-get update && sudo apt-get install vagrant
In the downloads page you may find the commads needed for
yum,dnfobrewif you are using CentOS/RHEL, Fedora or Homebrew respectively.
Once installation finishes make sure that the installed version matches with the one in Windows 10 (at the time of writing this article the last version of Vagrant is 2.2.19):
$ vagrant --version
Vagrant 2.2.19
Now we can install VirtualBox (if not already installed) or update it to the latest version which at the time of writing this article it is version 6.1. You should take note of the installation directory because it will be needed later on (default is “C:\Program Files\Oracle\VirtualBox”).
Configuration
Next thing we need is to enable the access of Vagrant to the Windows 10 installation of your Provider, in our case we will use the default one (and most supported by Vagrant) which is VirtualBox. This is done by exporting a couple of variables in the WSL2 terminal.
The first variable VAGRANT_WSL_ENABLE_WINDOWS_ACCESS will enable the use of an external provider instead of using a VirtualBox installed inside WSL2 and will use therefore the one installed in the host OS.
The second variable will be adding the VirtualBox install folder location to the PATH of the WSL2 user. So in order to export these variables you could edit the file ~/.bashrc with your favourite text editor or add them to the end of the file with these commands and then restart the shell (logout and login works):
echo 'export VAGRANT_WSL_ENABLE_WINDOWS_ACCESS="1"' >> ~/.bashrc
echo 'export PATH="$PATH:/mnt/c/Program Files/Oracle/VirtualBox"' >> ~/.bashrc
As I mentioned before I’m using the default install location, you may need to adjust the command with your own path to VirtualBox location.
We are not done just yet, but we are getting there to launch our first Virtual Machine and connecting through ssh to it. If you try to launch a Virtual Machine with Vagrant you will be met with errors that can look like these:
default: Warning: Connection refused. Retrying...
default: Warning: Connection refused. Retrying...
default: Warning: Connection refused. Retrying...
default: Warning: Connection refused. Retrying...
default: Warning: Connection refused. Retrying...
default: Warning: Connection refused. Retrying...
To fix this, the community has created a plugin. You can find the source code here, thanks Karandash8. To install it just run:
vagrant plugin install virtualbox_WSL2
At this point you could launch a Vagrant VM but the process would get stuck at default: SSH auth method: private key:
$ vagrant up
Bringing machine 'default' up with 'virtualbox' provider...
==> default: Checking if box 'centos/7' version '2004.01' is up to date...
==> default: Clearing any previously set forwarded ports...
==> default: Clearing any previously set network interfaces...
==> default: Preparing network interfaces based on configuration...
    default: Adapter 1: nat
==> default: Forwarding ports...
    default: 22 (guest) => 2222 (host) (adapter 1)
    default: 22 (guest) => 2222 (host) (adapter 1)
==> default: Booting VM...
==> default: Waiting for machine to boot. This may take a few minutes...
    default: SSH address: 172.25.64.1:2222
    default: SSH username: vagrant
    default: SSH auth method: private key
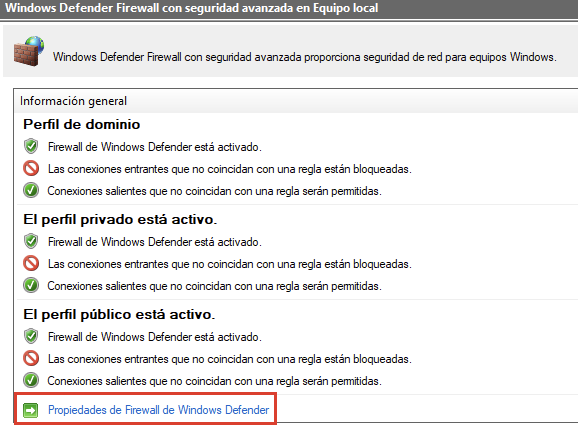
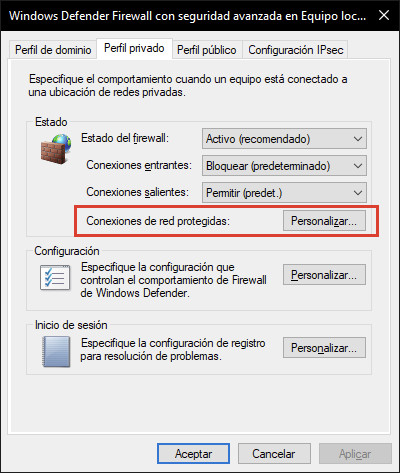
To fix this we need to disable the firewall of the vEthernet (WSL) interface. To do that we will open the Windows Firewall either searching for firewall on Windows 10 Start Menu or typing:
wf.msc
You will have to disable vEthernet (WSL) for the three profiles domain, private and public as shown in the pictures below:
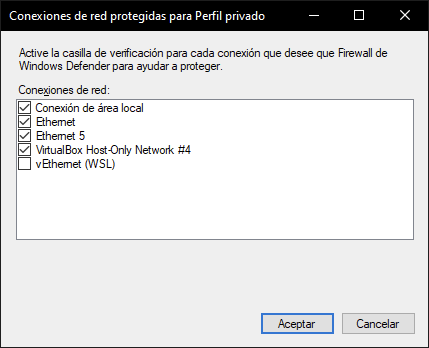
You may have to follow these steps every time you reboot your computer as in my case Windows 10 seems to reset that config.
Last steps
The last thing you should do fixes a problem that could happen to you when creating and running multiple VMs with ansible, if you ever come across this message:
Failed to open/create the internal network 'HostInterfaceNetworking-VirtualBox Host-Only Ethernet Adapter'
Apparently it is easy to fix as pointed out here:
- Open Windows Network Connections.
- Right click on VirtualBox Host only adapter.
- Choose properties.
- Check “VirtualBox NDIS6 Bridged Networking driver”.
- Disable and Enable the adapter.

There are other fixes that than be tried if none of the above does the trick, you can read more about them here.
Running Vagrant with Ansible
Yes! You made it here! You can finally launch your first Virtual Machine. First go to Discover Vagrant Boxes and choose the image that you wish. For this example I will choose centos/7.
Create a folder for the project, cd to it and run:
vagrant init centos/7
This command will create a Vagrantfile that you will need to edit to match your preferences. In this example the first thing we are going to do is to disable the shared folders option that Vagrant has activated by default for every VM that you create, so for every Vagrantfile you will have to disable it by adding this line config.vm.synced_folder ".", "/vagrant", disabled: true:
# -*- mode: ruby -*-
# vi: set ft=ruby :

Vagrant.configure("2") do |config|

  config.vm.box = "centos/7"
  config.vm.synced_folder ".", "/vagrant", disabled: true

end
Otherwise it will give an error, and we don’t need the shared folder just now.
At this point you could type vagrant up, Vagrant will download the image and run it automatically. Once booted you can type vagrant ssh to ssh into it.
Adding Ansible support is rather easy, the Vagrantfile should look like this once we remove all the text clutter:
# -*- mode: ruby -*-
# vi: set ft=ruby :

Vagrant.configure("2") do |config|

  config.vm.box = "centos/7"
  config.vm.synced_folder ".", "/vagrant", disabled: true
  config.vm.provision "ansible" do |ansible|
    ansible.playbook = "playbook.yml"
  end
end
You can now create a playbook.yml file in the same directory to play with the machine. I will paste the example I followed that user Geerlingguy created in his Ansible 101 series of videos:
---
- hosts: all
  become: yes
  tasks:
    - name: Ensure NTP is installed
      yum:
        name: ntp
        state: present
    - name: Ensure NTP is running
      service:
        name: ntpd
        state: started
        enabled: yes
This will check wether the NTP service is installed or not and if it is running or not. If you have your machine already up and running you can apply the playbook with the following command:
vagrant provision
A normal output would look like this:
$ vagrant provision
==> default: Running provisioner: ansible...
    default: Running ansible-playbook...

PLAY [all] *********************************************************************

TASK [Gathering Facts] *********************************************************
ok: [default]

TASK [Ensure NTP is installed] *************************************************

ok: [default]

TASK [Ensure NTP is running] ***************************************************
changed: [default]

PLAY RECAP *********************************************************************
default                    : ok=3    changed=1    unreachable=0    failed=0    skipped=0    rescued=0    ignored=0
You can see a changed=1 in the text, that means NTP service was not running. If we run the same command again we should see changed=0:
$ vagrant provision
==> default: Running provisioner: ansible...
    default: Running ansible-playbook...


PLAY [all] *********************************************************************

TASK [Gathering Facts] *********************************************************

ok: [default]


TASK [Ensure NTP is installed] *************************************************
ok: [default]


TASK [Ensure NTP is running] ***************************************************

ok: [default]

PLAY RECAP *********************************************************************
default                    : ok=3    changed=0    unreachable=0    failed=0    skipped=0    rescued=0    ignored=0
Wrapping up
As you can see using Vagrant with WSL2 on Windows 10 is not quite as straightforward as it would be in a Linux computer or a Linux partition, but heck if it is supposed to work why not try to make it work? For me it took some good Googling around trying everything that users mentioned, it was a lot of reading, but in this post I think I have summarized very well what it needs to make it work. At least with Vagrant version 2.2.19, who knows if a future update breaks everything, but so far I’m not thinking of updating it.
If it works, don’t touch it
Information taken from multiple sources from the internet


Leave a comment